Sausage Making 101: Classic Sage Sausage Recipe
Have you ever wondered how to make homemade sausage? It’s easier than you might think! This sage sausage recipe is not only delicious, but it also comes together quickly and easily. You’ll be able to impress your friends and family in no time.
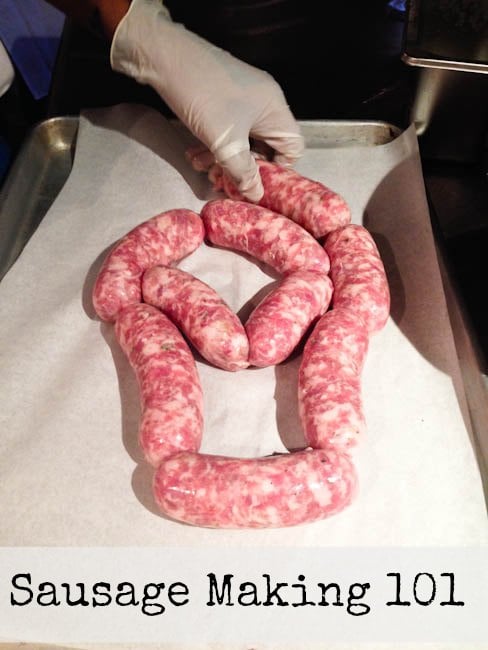
Fresh Sausage From Your Home Kitchen
I had the opportunity to take a few cooking classes while I was in New York City for the Wine and Food Festival. The Grand Tasting and the dinner parties are always the highlights of the Festival, but the classes are really great and a fantastic bargain!
I attended Sausage Making 101 and The Art of Chocolate Making.
Both classes were fantastic, but the sausage making class was my favorite. When I was telling people about it afterwards though, they all had a similar reaction which was “Oh, cool! But… do you think you’d really make sausage at home? Isn’t it messy?!”
While I’m not about to give up store bought sausage any time soon, I definitely will make it at home for special occasions. And making these homemade sage sausages isn’t messy at all – the “ick factor” is really no worse than making meatballs. Since I took a bajillion photos, I thought I’d do a step by step of the process so you can see for yourself.
(This recipe uses pork, but I’ve since made homemade beef sausage too!)
Tips for making homemade sausage
Equipment needed
To start, you’ll need a few things:
- a big bowl full of ice
- a smaller bowl that you can nestle into the ice to keep your meat cold
- a way to grind the meat.
I have this Kitchen Aid Meat Grinder Attachment at home, and it’s great (I also use it to make extra lean ground chicken from boneless, skinless chicken breasts), but you could also use a stand alone grinder.
Process
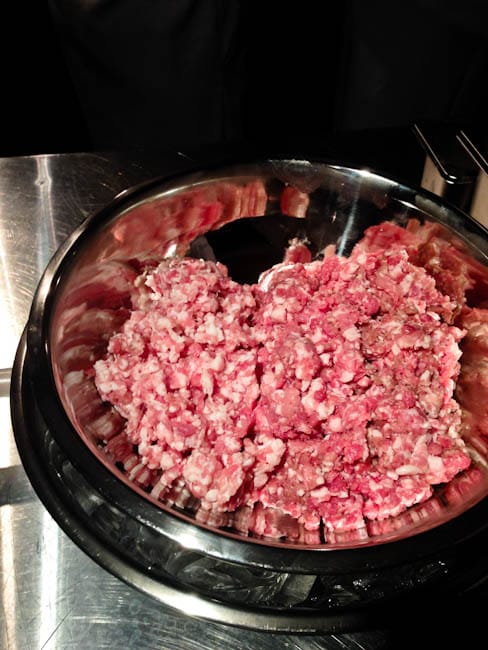
Grind your meat (a shoulder cut like picnic roast) through the coarse grinding plate, then put it into a bowl set on top of the ice. Sausage in an emulsion of meat and fat, and it’s much easier to work with when it’s super cold.
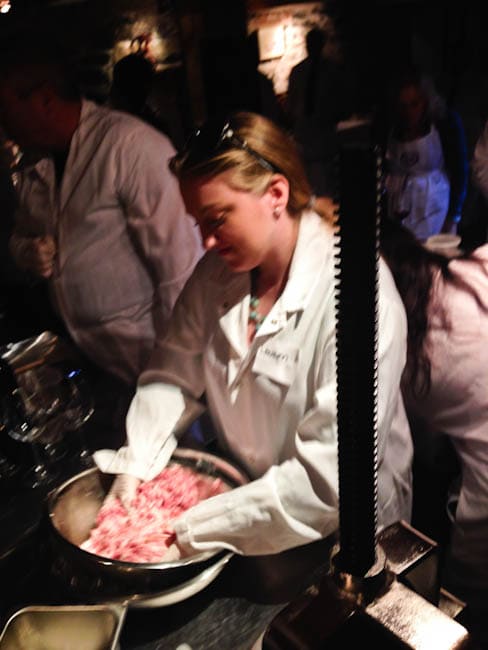
Use your hands to mix in the seasonings to make this sage sausage.
First, mix in the salt getting everything nice and blended.
Then, add toasted garlic, black pepper, and fresh sage.
When everything is thoroughly mixed, work in some white wine.
Pro Tip
- Press a small ball of meat into the bowl of a spoon and turn the spoon upside down. If the sausage stays for 5 seconds before falling, you’re ready to go! If not, add ice water little by little until you achieve the right balance.
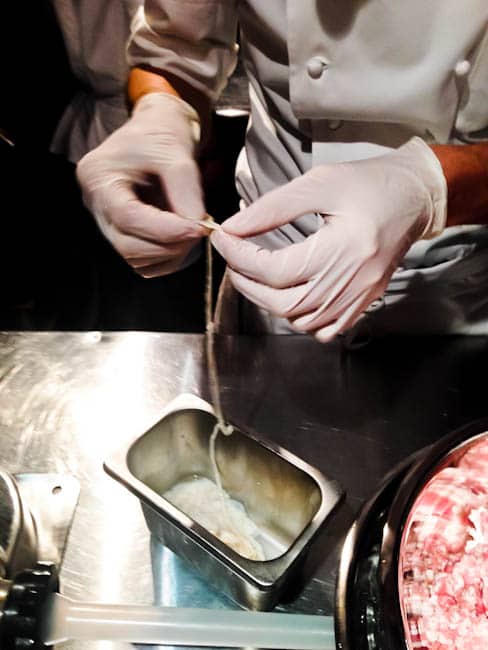
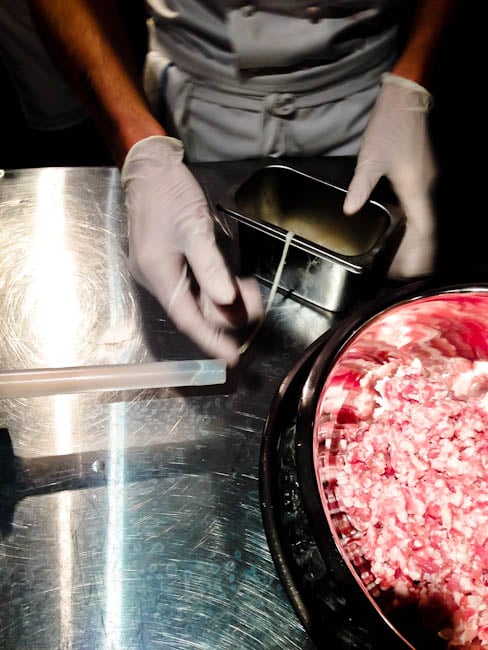
Next comes the the only slightly icky part: preparing the casings.
You can buy natural casing (intestine) or artificial casing (made from collagen or cellulose) online or at some major grocery stores or butcher shops. We worked with natural casing and I recommend that you do too – it gives the sausage a great “snap” that artificial casing can’t match.
The casing will come packed in salt brine and come in two sizes: hog is for larger sausages like we made and lamb is for smaller sausages (like breakfast links). Soak the casings in water, then flush them to ensure they’re nice and clean and to remove any of the brine.
Find an end and work the casing onto your stuffer (again, there’s a Kitchen Aid attachment that’s really affordable), leaving about 6 inches hanging off the end. The casings are a little slippery and pretty resilient and fairly easy to work with.
You can also skip the casing entirely and fry up sausage patties instead if you really want.
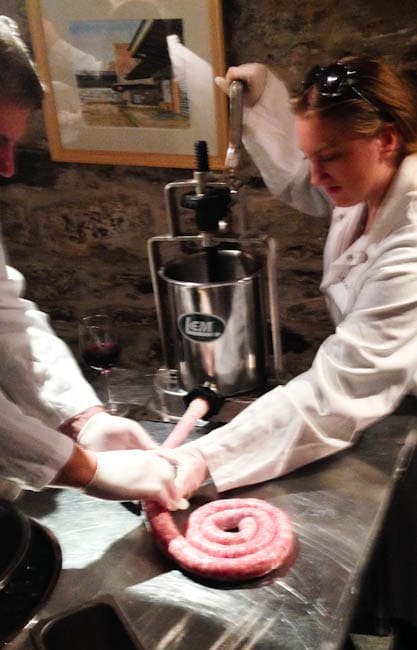
Load your meat in and SLOWLY start cranking it through, holding the loose end of the casing.
When the sausage starts filling the casing, tie the end off (it’s kind of like tying a balloon).
Keep churning the sausage through until you reach the end, working the sausage into a coil as you go. You’ll need to guide it gently to prevent it from getting overstuffed and bursting!
When you get to the end, tie it off.
To Shape sausage links
You can leave your sausage in a big coil or form links by sectioning off 3-inch pieces of sausage and twisting it around to separate it from the next one.
Twist one clockwise, then the next counterclockwise, until you’re done!
Now, take a sharp knife and poke a small hole in each link to let out any air that might have gotten trapped inside.
TA-DA! You made sausage!
They’ll keep for 3 days in the refrigerator or about six months in the freezer. Cook them for 7 minutes on each side until they’re cooked through – they’re so delicious!
Fry up your sage sausages for breakfast or dinner, or use them to make one of these recipes:
- Sausage Stuffed Acorn Squash
- Zucchini and Sausage in Pink Sauce
- Roast Sausages with Apples and Parsnips
- Baked Risotto with Sausage and Kale
- Cassoulet with White Beans, Sausage & Turkey

Ingredients
- 3 pounds pork shoulder
- 1 ½ tablespoons salt
- 1 tablespoon freshly ground black pepper
- 2 tablespoons minced toasted garlic
- ½ cup fresh minced sage
- 1 ounce white wine
- 2 cups ice water
- 1 small container sausage casing
Instructions
- Grind the pork through a coarse grinding plate. Place into a chilled bowl set into a larger bowl of ice. Using your hands or a wooden spoon, mix in the salt until well blended. Mix in the pepper, garlic, and sage.
- Add the white wine and test the consistency by pressing a small ball of meat into the bowl of a spoon and turning the spoon upside down; if the sausage stays for 5 seconds before falling, you’re ready to go! If not, add ice water little by little until you achieve the right balance.
- Form into patties or stuff into casings (see interactions above).
- Cook for 7 minutes on each side or until done.





Traditionally a summer sausage (like salami or bologna) has additional added salt and is smoked and dried so thoroughly it can be stored during summer without refrigeration. (They’ve been making it since before refrigerators were invented, and butchers and deli workers used to hang them in an unrefrigerated window) Today we use less salt and less cooking on our lunchmeats so refrigerating them is a must.
Winter sausage or “fresh sausage,” is what we eat at McDonald’s today, and what you probably had for breakfast, it is not preserved because winter temperatures will do the job.
I grew up on a farm, we slaughtered our own hogs, and made our own sausage. A standard sausage recipe is
– 2 lbs of pork from the roughest toughest, toughest cut of the animal,
– 1 lb of pork fat (adjusted slightly according to how fatty your choice of pork-cut is
– 1 lb of “variety meat,” the liver, kidney, brains etc. whatever it is that you normally don’t eat
Season to taste.
You can make anything from German sausage to Italian sausage to currywurst to Mexican chorizo, to sage sausage, to bologna so this varies a lot, but standard seasoning is as follows:
1 tablespoon of salt
½ tablespoon of black pepper
½ tablespoon of garlic powder
½ tablespoon of ground dried sage
Beer or wine to taste.
Onions or scallions to taste
Grind coarsely (like hamburger) for most sausages, grind very finely and cook or smoke for lunchmeat.
To make liverwurst you must use 33% liver (typically smoked ahead of time). To make Braunschweiger (a heavenly form of liverwurst) you must also use a lot of bacon. You thought liver and onions don’t taste good. You were making them wrong.
Where do you buy the casings?
Great job! I am not sure that I will have the patience to make this…but I sure hope a friend of mine does!